geometry of upright bass neck -- intro
The new forms of music that I'm imagining, will need upright bass. In particular, bowed bass. Aka double bass. Most likely, bowed electric upright bass. I love the cello, and almost everything I want to do could probably be done with a cello, but actually the range of instrument I'm meaning to cover is better served by the range of the electric bass: which is the same range as the upright, at least when it's tuned to the "jazz", or fourths, tuning (EADG).
But I also like "regular" electric bass, i.e., rock bass. But especially, fretless. It'd be nice if the bowed bass could also be played in a rock style.
Most electric upright basses are quite expensive (above $1000). There seem to be a few which are dramatically cheaper, like under $100. But I'm not sure, these may only be the 3/4 size ones. One name I saw is Stagg. In any case, these all have piezo pickups under the bridge, no rock-style magnetic pickups which I'd prefer.
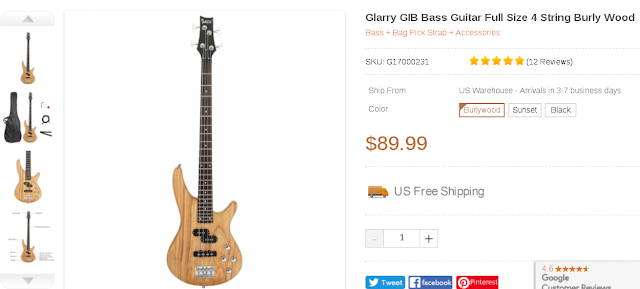
So I've started to consider building my own upright bass, with certain features to enable it to be used as a fretless rock bass, as well as bowed upright bass. The idea would be to start with one of the readily-available, pretty-good, under $100 basses, such as the Glarry GIB. Carve away a lot of the body to make room for the bow. Attach a new layer of wood to the fingerboard, to produce the required curved radius. Put the adjustable bridge up on a block, and additionally raise the two inner saddles, to produce the higher, curved shape of the string band. Fit a corresponding new nut. (Despite the large amount of re-working involved, I think it will still be easier to start with an existing manufactured bass, rather than simply building from scratch, though I'll admit it gets to be a close call. The $100 procures tuning machines, a set of bass strings, two pickups and associated circuitry, and most of the wood needed for this project: a price point which would be virtually impossible to hit, buying the components separately.)
One of the most complicated parts is determining the shape of the neck (fingerboard). Basically, the pattern of the four strings, and of the fingerboard beneath it, wants to have a changing radius of curvature: slightly curved but close to flat up near the nut, to enable easy rock-style fingering; and much more tightly curved at the other end, down by the bridge, to facilitate access to any of the four strings individually with the bow, without hitting the adjacent strings. Example measurements would be a curvature radius of around 9-12 inches at the nut, tightening down to around 2-4 inches at the bridge. This is called a "compound radius".
The trick is, moving from the nut towards the bridge, the radius decreases, but the spacing between the strings actually increases. The strings are close together at the nut, and more widely spaced at the bridge. This causes the optimal geometry of the fingerboard to become a rather complex shape.
In particular, the optimal fingerboard shape is not a section of a cone. I.e., the rate of change in the radius is not constant. This is unfortunate, because it is much easier to design a routing jig which can cut a conic section. Optimal shaping may require CNC and/or other trickery. It seems that traditional builders may start with a simple shape, such as cone or even just cylinder, and then just manually carve or sand away more material until a usable shape is produced.
So reputable builders seem to produce the required shape, through "art" and iterative experimentation, rather than by analysis of the formal geometry. At least, in my searching, I have not yet found the latter approach documented on the Internet. Since I am not in any way reputable, I am open to trying other approaches!
So in this blog, I'll document my own mental wanderings, as I try to figure out this interesting geometry problem.


Comments
Post a Comment